Setup Cloud Connector
Tutorial Videos
![]() rrCloud - Cloud Connector Setup
rrCloud - Cloud Connector Setup
![]() Complete Tutorial Playlist for AWS
Complete Tutorial Playlist for AWS
1. rrCloudManager - Settings
1. Open rrCloudManager and go to Extras -> Settings.
2. Click on Add new Connector.
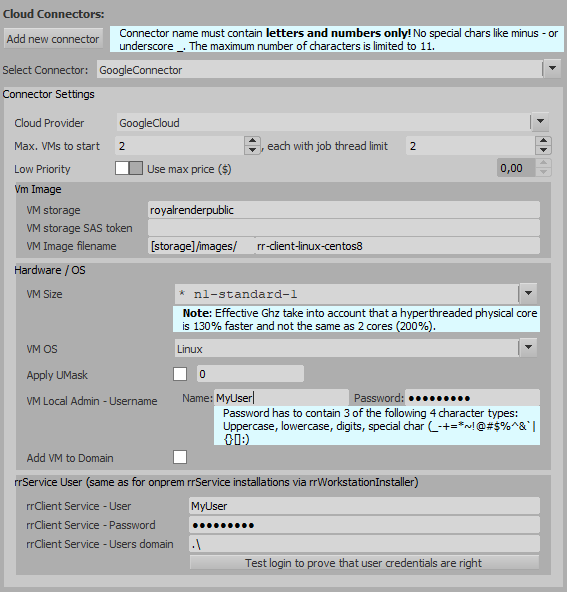
3. Connector Settings:
- Cloud Provider: Select the provider you've created in chapter Basic Setup.
- Low Priority: Low-priority VMs generally have a lower price, but AWS might stop these if needed for other tasks. The max price setting is omitted by AWS.
- VM image: Enter the VM image file name. (If you like to use our demo image enter: rr-image-linux-centos-7)
- VM Size: Choose you desired VM size according to your needs. You can find more details about VM sizes and pricing here.
- VM Admin Username: Each VM requires a local admin account. Choose any name you like.
- VM Admin Password: Password for the local admin account.
- Max. VMs to start: This is the maximum numbers of VMs in this CloudConnector.
- If you want to add your VMs to your companies domain, check Add VM to Domain.
- rrClientService - User: Same requirements as with the local rrService user that you setup in rrWorkstationInstaller
- rrClientService - Password: <YourPassword>
- rrClientService - User domain: <YourDomain> (.\ for local user)