3rd Party Renderer
Alembic file export
Royal Render provides a function to pick objects to export via RRs Maya plugin.
Python Script execution
Royal Render provides a function to pick a script file to run via RRs Maya plugin.
Please note that RR will use the same script it uses for rendering at first.
This means RR sets the Render Layer, Camera and other setings the same way as if it would render the scene.
Arnold/MtoA
Arnold License
Maya is shipped with an UI license of Arnold.
It does NOT contain any Arnold license.
You need separate Arnold batch licenses to render with Arnold via RR.
Please see our help page Autodesk Licensing for more information.
Optional: Farm-wide Install
It is possible to enable a farm-wide shared MtoA folder for Royal Render.
This way you can ensure that all clients use the same MtoA version. And you can use different MtoA versions for different jobs.
- Edit [RR]\render_apps\_setenv\all\maya__inhouse.rrEnv with baEnvFile_Editor (or a text editor).
Search for RR_MTOA_NETWORK and set it to = 1
Optional: You can change the default search path for the farm-wide installation. See section "Optional: Multiple MtoA versions" to change the path.
- Submit a render and check the render log file in rrControl.
Search for the line "MtoA source path is set to".
Create this folder.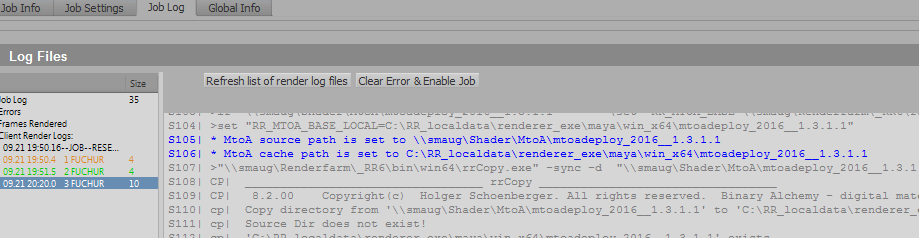
- Copy files and subfolder from from our MtoA installation c:\solidangle\mtoadeploy\20xx\ or C:\Program Files\Autodesk\Arnold\maya20xx\ into that folder.
- Optional: Copy your shader libraries into the subfolder "shaders"
Optional: Multiple MtoA versions
- Use the description "Farm-wide Install" as stated above.
In addition when you edit the file [RR]\render_apps\_setenv\all\maya__inhouse.rrEnv
Search for a comment " Uncomment the next 3 lines if you want to have a separate folder for each MtoA"
and uncomment those next 3 lines.
If you change the path, the path MUST contain <ExeVersionMajor>, otherwise you cannot use different Maya versions. - Submit a job and search for "MtoA source path is set to".
- Copy MtoA into that folder (See help section above)
Unfinished frames / missing tiles
If Arnold gets aborted while rendering .exr files, then it happens that it has written a valid, but unfinished image.
As the image is valid, RR cannot detect that it is unfinished.
You can disable "tiled" in Arnolds render settings. Then this will not happen.
Disadvantages:
- Arnold requires a bit more memory as it has to keep all image buffers in memory
- You cannot view an image while it is being rendered.
Ass N Render
You can change the renderer to "arnold- Ass N Render" at the rrSubmitter.
Instead of starting Maya and rendering the Maya scene with MtoA, it will start Maya, export .ass files to a local temp folder and renders these .ass files with kick.
This will save all the memory that would be required by Maya for opening the scene file.
Note:
You must not set the render options in Maya to"Export Ass" or "Export Ass and Kick".
Set the Arnold render settings to "Interactive".
Note:
KSO mode is not supported.
Export .ass
To export .ass files, change the Arnold render settings in your Maya scene. System/ Render Settings/ Render Type to "Export Ass".
The rrSubmit plugin read the .ass export filename instead of the usual image filename.
And it changes the renderer to arnold-exportAss.
Errors
Windows:
Arnold requires the "documents & settings" or "users" folder on windows to work.
If you have installed the rrService with some user, then you have to login once on the machine with that user to let windows create the user folder.
Vray
Farm-wide install
You have two options to run VRay:
- Install it on every machine (default)
OR - Use a farm-wide install in RR that is used on every machine.
2. Use farm-wide install
- Edit [RR]\render_apps\_setenv\all\maya__inhouse.rrEnv with baEnvFile_Editor (or a text editor).
There is a blocks that start with "################### VRay environment variables ###################".
Uncomment the line with RR_VRAY_NETWORK = 1
Optional: You can change the default search path for the farm-wide installation. See next help section "Multiple VRay versions" to change the path. - Submit a render and check the render log file in rrControl.
Search for the line "VRay source path is set to". (See MtoA above for a screenshot of such a message)
Create this folder.
In this example we assume the path is [RR]\render_apps\renderer_exe\maya\win_x64\vray2022 - Extract the VRay installer, Chaos Group named this VRay Portable (https://docs.chaos.com/display/VMAYA/Portable+Installation)
Extract the folders in this zip file and place them as subfolders into [RR]\render_apps\renderer_exe\maya\win_x64\vray2022\.
You should end up with three new subfolders:
[RR]\render_apps\renderer_exe\maya\win_x64\vray2022\maya_root
[RR]\render_apps\renderer_exe\maya\win_x64\vray2022\maya_vray
[RR]\render_apps\renderer_exe\maya\win_x64\vray2022\vray
Optional: Multiple VRay versions
- Edit [RR]\render_apps\_setenv\all\maya__inhouse.rrEnv with baEnvFile_Editor (or a text editor).
- Inside the VRay section, search the file for a comment "Uncomment the next 3 lines..." and uncomment those next 3 lines.
If you change the path, the path MUST contain <ExeVersionMajor>, otherwise you cannot use different Maya versions. - Submit a job and search for "VRay source path is set to".
- Install VRay into that folder (See "Use a shared copy in RR that is used on every machine" above)
Irradiance Map pre-render
You can render Vray Irradiance Maps via RR.
- Set your Irradiance Mode to 'Animation(render)'
- Set the Irradiance File Name
- Set your Irradiance Mode back to 'Animation(prepass)'
- Set your Irradiance Mode to 'Multiframe incremental'
Error - Fluids
If you render with fluids, you might encounter a massive slowdown.
Even if you have cached the fluid files.
VRay will fix this for the upcoming version, but for now the solution is to
enter the following into the "pre render Mel" script in Maya to get it to behave:
$i = `getAttr "defaultRenderGlobals.startFrame"`; currentTime -edit $i; print`currentTime -q`;
Error - Render Element Separator
There seems to be a bug in VRay. (at least version 1.5 Sp4)
No matter what you use as Render Element Separator ( . _ - ), VRay always renders with a . (point).
Therefore RR cannot find the images.
Please use the default setting . (point) as Render Element Separator.
License Server
If you have issues with the license server, please see VRay Standalone.
Note: The path in the help file above for the vrlclient.xml changes to
[RR}\render_apps\renderer_prefs\maya\mac_x64\vrlclient.xml
Fluid Caches
There is a render config file for rendering Maya fluids.
To use it, you have to copy the file
RR\render_apps\_config\additional\3D02__Maya2008__FluidCache.cfg
into RR\render_apps\_config\3D02__Maya2008__FluidCache.cfg
In the file is a description how to submit it via console.
Or you can change the renderer in rrSubmitter and change the values as shown in the render config:
# Variables you have to set differently from a default rendering:
# renderer= "FluidCache"
# layer: name of the fluid shape
# imageDir: Folder for the cache files
# imageFilename: Filename of the cache file. IMPORTANT: The filename has to end with "Frame".
# ImageExtension: ".mc"
Redshift
Redshift has two modes in RR:
1) Farm-Wide Installation (default)
This way you can ensure that all clients use the same Redshift version.
You can use different MtoA versions for different jobs.
Redshift does not require to be installed on each machine
2) Local installation
RR uses the local installation C:\ProgramData\Redshift
To switch to this mode, please edit the file [RR]\render_apps\_setenv\all\maya__inhouse.rrEnv with baEnvFile_Editor (or any text editor).
Search for RR_REDSHIFT_NETWORK and set it to = 0
Farm-Wide installation
- Install Redshift on your workstation.
- Submit a render and check the render log file in rrControl.
Search for the line "RedShift source path is set to". (See MtoA above for a screenshot)
Create this folder. - Copy the files and subfolders of c:\ProgramData\Redshift\ into that folder
Hint: To minimize the folder size, you can remove all other software packages form the Plugins subfolder of Redshift
Optional: Different network source folder
- Edit [RR]\render_apps\_setenv\all\maya__inhouse.rrEnv with baEnvFile_Editor (or a text editor).
- Inside the Redfshift section, search the file for a comment "Uncomment the next 3 lines..." and uncomment those next 3 lines.
If you change the path, the path MUST contain <rrJobRendererVersion>, otherwise you cannot use different Maya/Redshift versions. - Submit a job and search for "Redshift source path is set to".
- Install Redshift into that folder (See above)
License
If you are using the farm-wide installation, then RR uses the license files located inside this folder.
If local license files exists, then these are used (e.g. for node-locked licenses) instead of the farm-wide license file.
C:\ProgramData\Redshift\redshift-core.lic
C:\ProgramData\Redshift\redshift-core2.lic
/home/${USERNAME}/redshift/redshift-core.lic ( ${USERNAME} is the user that the rrClient is running with)
/home/${USERNAME}/redshift/redshift-core2.lic
Maxwell
Linux - cannot connect to X server
If you get this error, please add
setenv DISPLAY=:0.0
To your maya.sh setenv file.
Mental Ray
With each Maya network license you get 5 batch render licenses.
With the UI licenses you end up with 6 possible licenses for batch rendering.
Custom Shaders
If you want to render with custom/3rd party shaders, you have to copy the files into:
[RR]\render_apps\renderer_plugins\maya\win_x64\2009\mentalray\include
[RR]\render_apps\renderer_plugins\maya\win_x64\2009\mentalray\lib
If you do not like these paths, then you can change them in the setenv file for maya.
RenderMan
Farm-wide install
Royal Render changes the environment that you do not have to install renderman on all machines.
- Install RenderMan on your workstation.
- Submit a render and check the render log file in rrControl.
Search for the line "RenderManForMaya source path is set to" and "RenderManProServer source path is set to".
(See MtoA above for a screenshot) - Copy the folders from your local RenderMan installation to these folders.
Rib Export
Please see Archive Renderer/Renderman