Capture Image
1. Clear old log and temp files
|
|
Windows |
Linux |
|
Required: rrService setup files |
|
|
|
Required: |
|
|
|
Recommended: RR service logs |
|
|
|
Stop rrClient |
|
|
|
Optional: OS Logs |
|
|
|
Optional: Azure Logs |
|
|
|
Optional: OS Cleanup |
|
|
2. Sysprep and generalize the VM image
This steps removes all personal data and specific hardware information of the machine from the OS.
|
Windows |
Linux |
|
|
- Open this website: https://resources.azure.com
- Deallocate,
Generalize
and Capture the VM.
Tutorial: http://www.codeisahighway.com/how-to-use-arm-explorer-to-capture-your-own-custom-virtual-machine-image-under-azure-resource-manager/
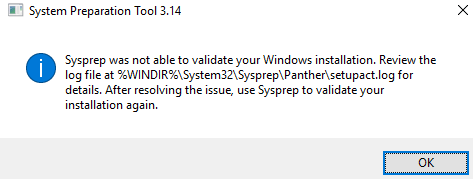
Note:
|
If you see this message, please restart the VM. Windows Updates are pending. |
|
3. Move the image file
- Download the "Microsoft Azure Storage Explorer" and either add your storages one by one via the storage keys or login with your Azure account to access all storages.
- Either create a new storage via the portal for your finished VM images
or use the one you have created for this VM (If you have not used "II D Modify existing image"). - Open the Blob Container of the storage for the finished VMs
Create a subfolder (container) named "images" as target. - Open the folder (container) "system" on the storage with the captured VM. Follow the subfolders until you find a file starting with the name you used to capture the VM.
Select the .vhd file (not the other file) - Press F2 and rename the image to something more simple.
Do not forget the .vhd extension. You are only allowed to use more than one underscore _ . Better use multiple minus - instead. - Press the copy button in the menu. Browse to the target "images" folder and paste it.
- Wait until the image is copied.
- If you used "IIC Create new image", then cleanup old items:
Delete the VM you created, then delete the NIC and IPs.
At last, either delete the source storage or, if the storage was the target as well, delete all files in the system folder and the vhds folder.
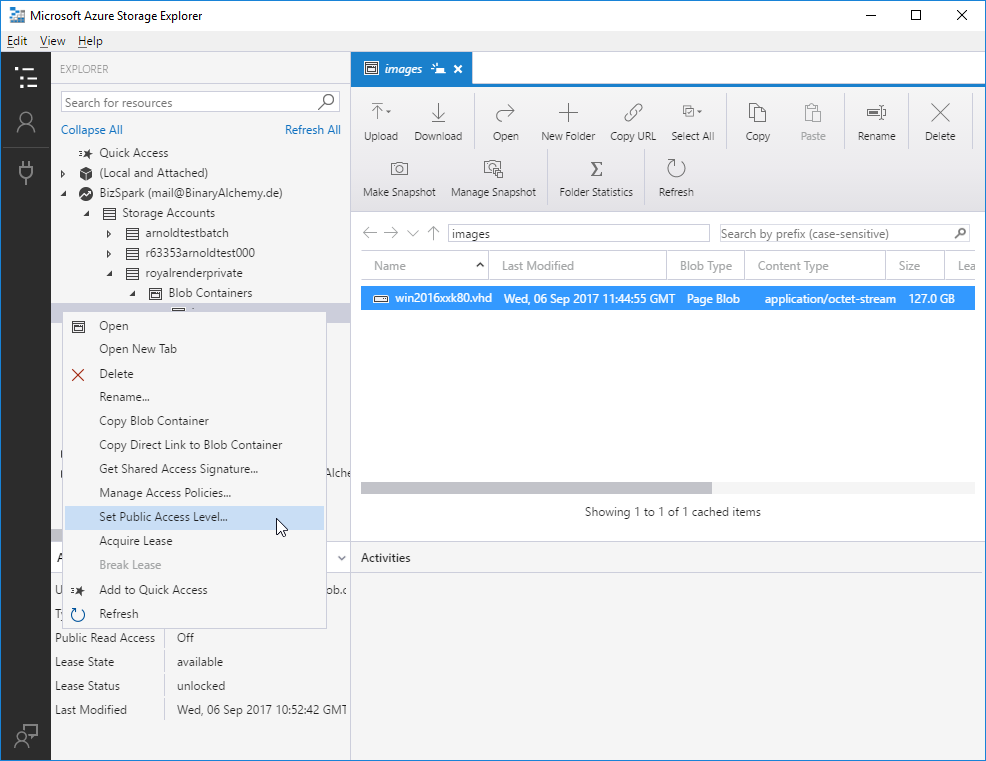
4. Source image access rights
There are two options in order to access your source image:
- Grant public read-only access to the "images" folder (A)
- or create an SAS token (B).
A) Grant public access
- Please open Azure Portal.
- Go to storages.
- Select the storage with your source image.
- Select "Blobs" from the right hand side.
- Select folder "images"
- Goto top menu item "Access rights" and select "Blob (anonymous read access for blobs only)".
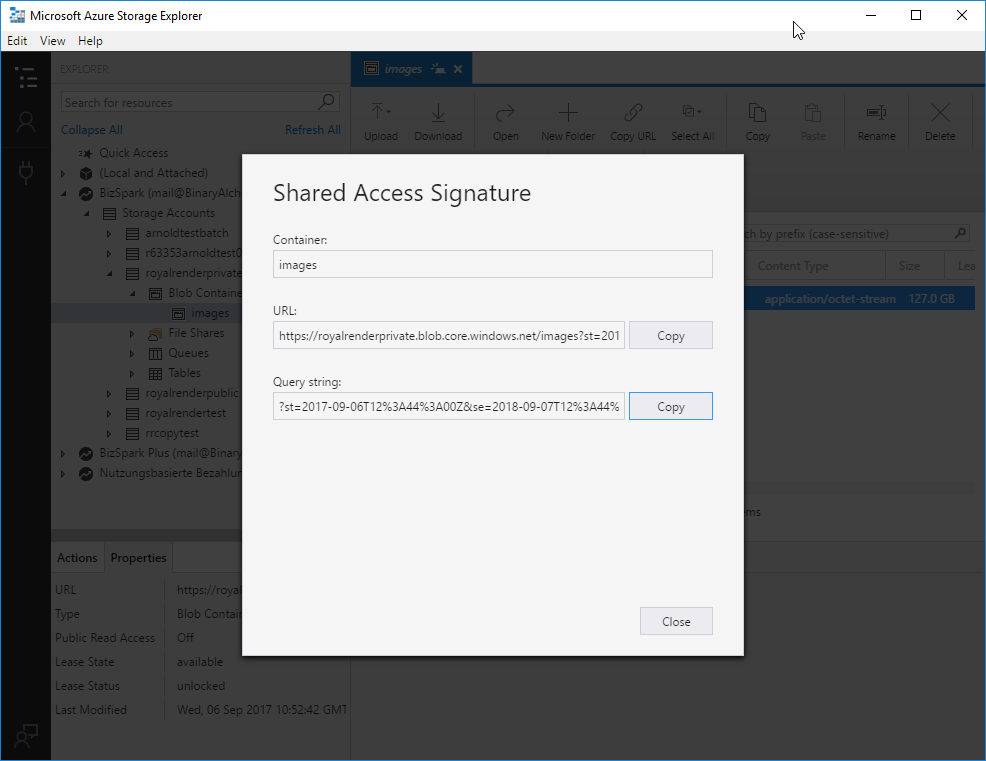
B) SAS token
- Please open Azure Portal.
- Go to storages.
- Select the storage with your source image.
- Select "Blobs" from the right hand side.
- Select folder "images"
- Goto top menu item "Access rights" and select "Private (no anonymous access)".
- Download the Microsoft Azure Storage Explorer and add your storages via the storage keys or login with your Azure account to access all storages.
- Right-click on the "images" folder and select "Get Shared Access Signature ...".
- Change the start day to yesterday, choose an expiry time and set permissions to "read".
- Click "Create".
- Copy whole "Query" string.
- Open rrConfig and select "Cloud" tab.
- Select your CloudConnector.
- Paste token to vmStorageSasToken.
- Save settings.