II C. Create New Image
1. Create a VM
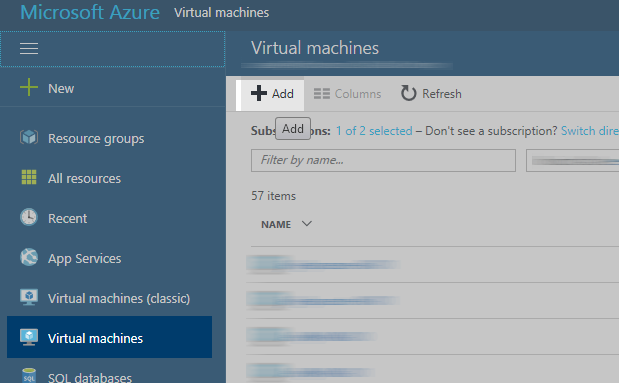
Select Virtual Machines from the menu and press the +Add button

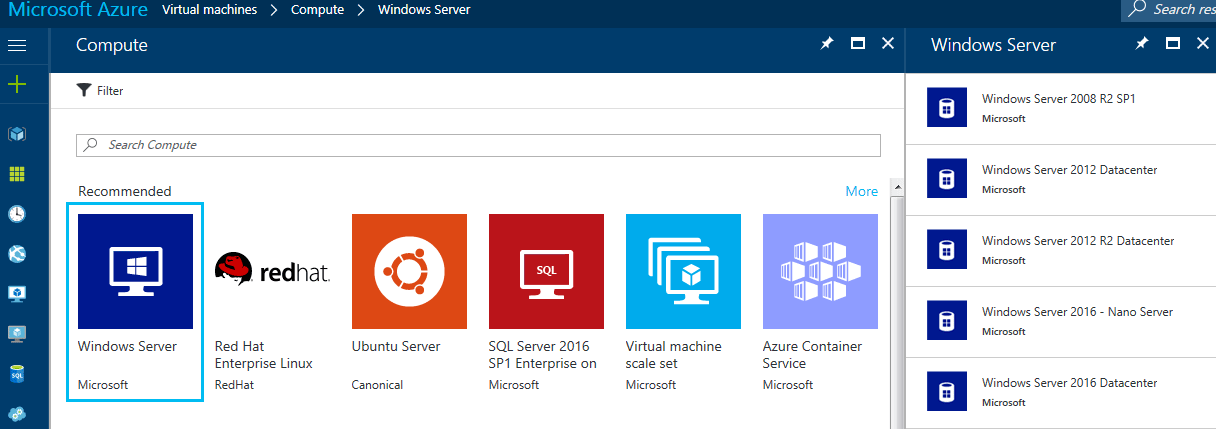
Choose the OS you want to use. OS Notes:
- Windows Server will cost license fees, Linux does not.
- Windows: We recommend Windows 2016 Datacenter (requires 13,2 GB) or Windows 10 (Once available in late 2017)
- Linux: We recommend CentOs 7.3
- 30GB images require less time to create, boot and shutdown. Depending on your render applications you install, this could be enough.
- If you want to use the image for GPU rendering, you should select the same type of GPU for this base image. Then you can install the NVidia drivers.
Of course GPU images with the driver files added to Windows can be used for non-GPU machines.

VM Notes:
- Basics
- The user/pass is required to remote login on the machine.
- The disk type (SDD, HDD) does not matter besides there are more HDD type VMs (which are cheaper).
On the other side SDDs are faster and you spend less time installing software.
- Size:
- The "Size" (VM type) does not matter as we will only use an image of the VM afterwards.
Therefore you can choose almost the cheapest one. (Not less than 2GB memory and at least 2 cores to install everything faster)
It does only matter if you want to use a GPU machine. In this case you have to use the same GPU type to install the NVidia drivers.
(On the other side, GPU images can be used for non-GPU machines)
- Settings:
- NO managed discs. We want to have our VHD file where we want to.
- Choose your storage created in step 2, do not create a new one.
- If you have created a Virtual network, please select it, otherwise let Azure create one.
- Public IP:
If you have a VPN connection to the Azure Virtual Network, then you can use the local IP.
Otherwise you have to assign a Public IP to your VM. You can later remote-connect to the VM by entering this public web address/name. - Network Security Group (Firewall): Do not remove the RDP inbound rule. Otherwise you cannot connect to your VM via the Windows Remote Desktop Connection app.
- If you use diagnostics, we recommend not to create a new storage for an better overview of your Azure items.
2. Remote Connect and Install Apps
Remote Connect
- Wait about 7-12 minutes until the VM was created. The status has to be "Running".
- Open the Remote Desktop Connection or an SSH application (RR/bin/3rdparty/...putty) on your workstation and use the local ot public IP of the VM (as shown on the portal).
If you have assigned a public IP, then use the connect button to open a connection
Windows notes: It is recommended to change the options of the RDP connection. This is not possible if you use the connect button.
Recommended Changes: - Lower the resolution that the remote window is smaller that your workstions desktop.
- Allow a file share connection to access files from your workstation at the VM. (In case you do not download apps directly via a browser)
- Use the user/pass that you have assigned during the creation and log in.
Copy (installer) files to the VM?
There are a few ways to get files onto the VM:
- Download files from the Internet directly on the VM. This is often the fastest way.
- Linux: Use an application that can copy files via SSH (SFTP).
- Windows: Use the remote desktop drive share (see above)
- Windows: Enable the admin shares on the VM and copy everything to //machine/d$
Use the temp drive!
You have a few options to get your installer files to the VM.
In any case you should ALWAYS copy the files to the VMs temp SSD drive.
The drive is located in D: on Windows and /mnt/resources on Linux.
If you extract installers (Like Autodesk), extract it to the temp drive as well.
This keeps the system drive less cluttered and clean.
Note: DO NOT change the temp drive location. RR uses it while rendering!
Install Apps and drivers
Install all the apps that you need and that are not setup in RR as shared exe or shared plugin.
|
Windows |
Linux |
|
|
3. Install the RR cloud service
|
|
Windows |
Linux |
|
Royal Render v8 |
|
|
|
Royal Render v9 |
|
|
Note: The service will do some changes to a system once a new or this VM is booted
- It opens the firewall ports to allow ping, ssh/rpd, Azure batch ports, Royal Render ports, windows only: file and printer sharing (includes Admin shares //machine/c$)
- Linux: Allow SSH login via user accounts (Azure Batch disables this)
The service can/will do the following changes if connected to the rrCloudManager.
- Mount drives (according to rrConfig / Paths and drives )
- Match the time zone with rrCloudManager
- Joins the domain (according to rrConfig / Cloud )
- Adds the rrService user to the local admin/wheel group (rrService user is set in rrConfig / Cloud )
- Adds the rrCloudManger and the additional servers to the host file (additional servers are set in rrConfig / Cloud )
- Adds the local VM Admin account (rrConfig / Cloud ) for Azure Batch VMs
- Of course it starts the rrClient
4. "III. Capture Image"
Continue with the section >> III. Capture Image